The internet is filled with useful content, but it also contains harmful, distracting, and inappropriate websites. Whether you’re a parent wanting to protect your child, an employer restricting access to certain sites, or someone who wants to improve focus, blocking websites on an iPhone is a great solution. Fortunately, Apple provides built-in tools, and there are also third-party apps that help you restrict website access efficiently.
This guide will walk you through multiple ways to block websites on iPhone, from using Apple’s Screen Time settings to router-level blocking and third-party apps.
Why Block Websites on iPhone?
Blocking websites on an iPhone can be beneficial in many ways, including:
- Parental Control: Prevent children from accessing inappropriate content.
- Increased Productivity: Avoid distractions from social media or gaming sites.
- Cybersecurity: Protect against phishing sites, malware, and harmful content.
- Restricting Screen Time: Encourage healthier device usage habits.
How to Block Websites on iPhone Using Screen Time
Apple’s Screen Time feature allows you to block websites on Safari and other browsers on your iPhone. Here’s how you can do it:
Blocking Adult Content and Specific Websites
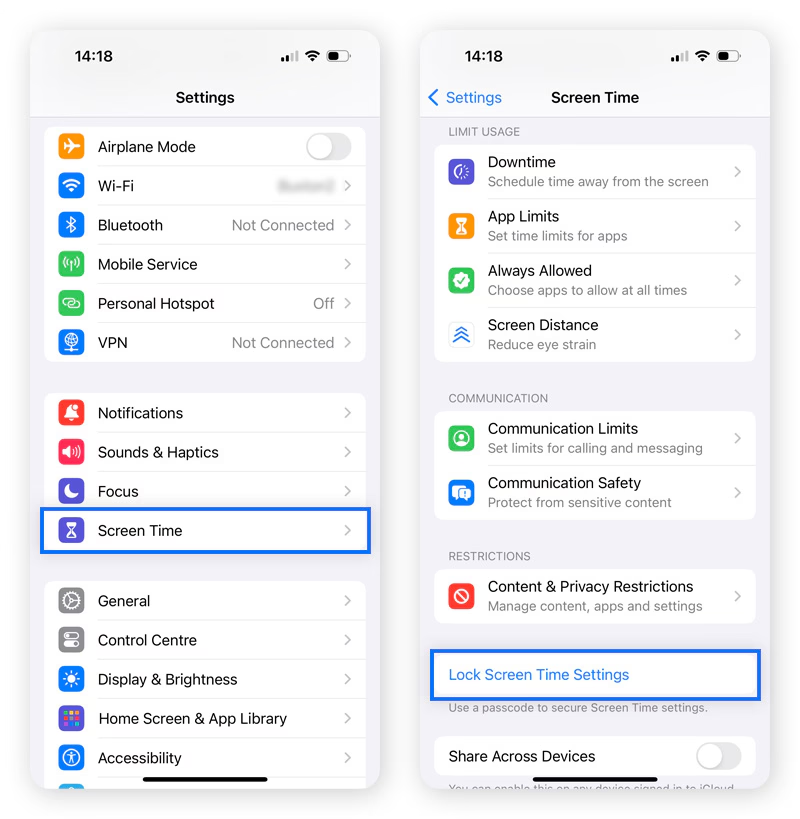
- Open Settings on your iPhone.
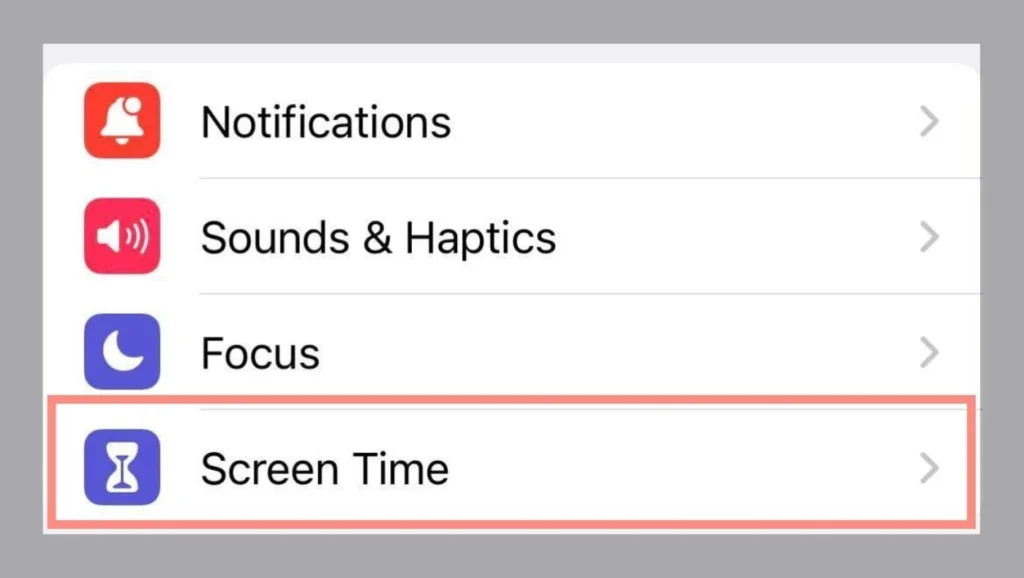
- Scroll down and tap Screen Time.

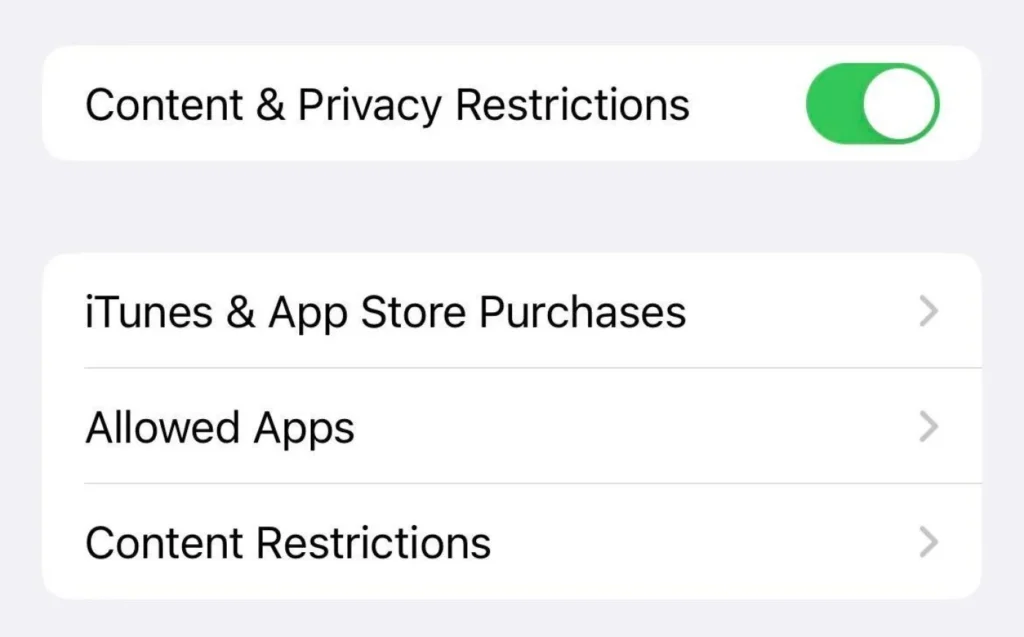
- Select Content & Privacy Restrictions.

- Tap Content Restrictions.

- Scroll to Web Content and choose one of the following:
- Unrestricted Access: Allows free browsing.
- Limit Adult Websites: Blocks known adult websites and lets you add more sites to the blocklist.
- Allowed Websites Only: Restricts browsing to pre-approved websites only.
Adding Websites to the Blocklist
If you choose Limit Adult Websites or Allowed Websites Only, you can manually block specific websites by following these steps:
- Under Limit Adult Websites, tap Add Website under “NEVER ALLOW.”
- Enter the URL of the website you want to block.
- Tap Done to save the changes.

Now, that website will be blocked in Safari, Chrome, and other browsers on your iPhone.
How to Block Websites on iPhone Using a Router
For a network-wide restriction, you can block websites on your Wi-Fi router, preventing any device connected to the network from accessing them.
Steps to Block Websites via Router Settings
- Find Your Router’s IP Address:
- Open Settings > Wi-Fi.
- Tap the connected network and note the router’s IP address.
- Access Router Settings:
- Open a web browser on your iPhone.
- Enter the router’s IP address in the search bar.
- Log in using the admin credentials (check your router manual for default login details).
- Block Websites:
- Look for Parental Controls, Security, or Website Blocking settings.
- Add the websites you want to block.
- Save changes and restart your router.
Now, anyone connected to this Wi-Fi network will be unable to access blocked websites, even if they switch devices.
Using Third-Party Apps to Block Websites
For additional control and customization, you can use third-party website-blocking apps available on the App Store.
Best Apps for Blocking Websites on iPhone
Here are some top-rated website-blocking apps:
- BlockSite: Allows you to block websites, apps, and distractions.
- Norton Family: A parental control app that restricts web content and monitors browsing.
- Freedom: Helps users block distractions for better productivity.
- FamiSafe: Ideal for parents to manage screen time and block inappropriate sites.
How to Use a Third-Party Website Blocker
- Download a website-blocking app from the App Store.
- Open the app and set up an account.
- Select the websites you want to block.
- Enable restrictions and apply settings.
These apps provide advanced features, such as scheduling website blocks and applying restrictions across multiple devices.
How to Block Websites on iPhone Using DNS Filtering
A DNS (Domain Name System) filter provides another way to restrict access to harmful websites.
How to Use DNS to Block Websites
- Go to Settings > Wi-Fi.
- Tap the network you are connected to.
- Scroll down and select Configure DNS.
- Choose Manual and tap Add Server.
- Enter a custom DNS address that blocks harmful sites, such as OpenDNS (208.67.222.123, 208.67.220.123).
- Tap Save to apply the changes.
Using DNS filtering blocks specific website categories, including adult content, phishing, and malware.
Setting a Passcode to Prevent Website Access
If you’re blocking websites for a child or another user, setting a passcode on Screen Time ensures they cannot change the settings.
Steps to Set a Screen Time Passcode
- Go to Settings > Screen Time.
- Tap Use Screen Time Passcode.
- Enter a 4-digit passcode.
- Confirm the passcode and enter your Apple ID for recovery.

Now, only you can modify the blocked websites list or Screen Time settings.
Blocking Websites on iPhone Without Using Screen Time
If you don’t want to use Screen Time, you can still block websites using Safari Restrictions:
Steps to Block Websites via Safari Restrictions
- Go to Settings > Safari.
- Enable Block Pop-ups to prevent access to pop-up websites.
- Turn on Fraudulent Website Warning to block malicious sites.
While this method is not as restrictive as Screen Time, it helps filter unwanted content.
How to Unblock Websites on iPhone
If you need to remove a blocked website, follow these steps:
- Go to Settings > Screen Time.
- Tap Content & Privacy Restrictions > Content Restrictions.
- Scroll down to Web Content.
- Remove the website from the Never Allow list.
The website will now be accessible again.
FAQs About Blocking Websites on iPhone
Final Thoughts
Blocking websites on an iPhone is a simple yet effective way to protect children, improve productivity, and secure online safety. Whether you use Screen Time settings, router controls, DNS filters, or third-party apps, you can easily restrict access to unwanted content.
By following the methods outlined in this guide, you can effectively manage website access on your iPhone and ensure a safer, distraction-free browsing experience.


