
You can record your singing by using GarageBand and Voice Memo app on iPhone. If you are fond of singing and want to hear your recorded voice on your iPhone, it is simple to do so.
All you need is an app and your singing voice. You can record your singing using the simplest and cheapest way by recording it on GarageBand and Voice Memo app on iPhone.
Using GarageBand to Record Singing on iPhone
GarageBand is Apple’s music creation app that lets you record your voice and singing on iPhone. It is a great app for vocal recording as it lets singers record and edit their songs. Here’s how you can use GarageBand to record singing:
1- Open the GarageBand
Download the GarageBand on iPhone by going to the App Store. If you already have the app, you will see ‘Open’ instead of ‘Install’.
2- Record Your Singing on GarageBand
Once the app is opened and downloaded, you will have to choose which type of singing you want to record. You can do the recording by:
- Swipe left or right to see the Audio Recorder Option.
- You can change the Tempo in the Settings.
- You can also turn Metronome on and off by clicking on it.
- You have to press the Red Button in the middle to start recording.
- Start singing with the metronome or backing track(if you are using one).
- When you are done with recording, press the record or play button to save the recording.
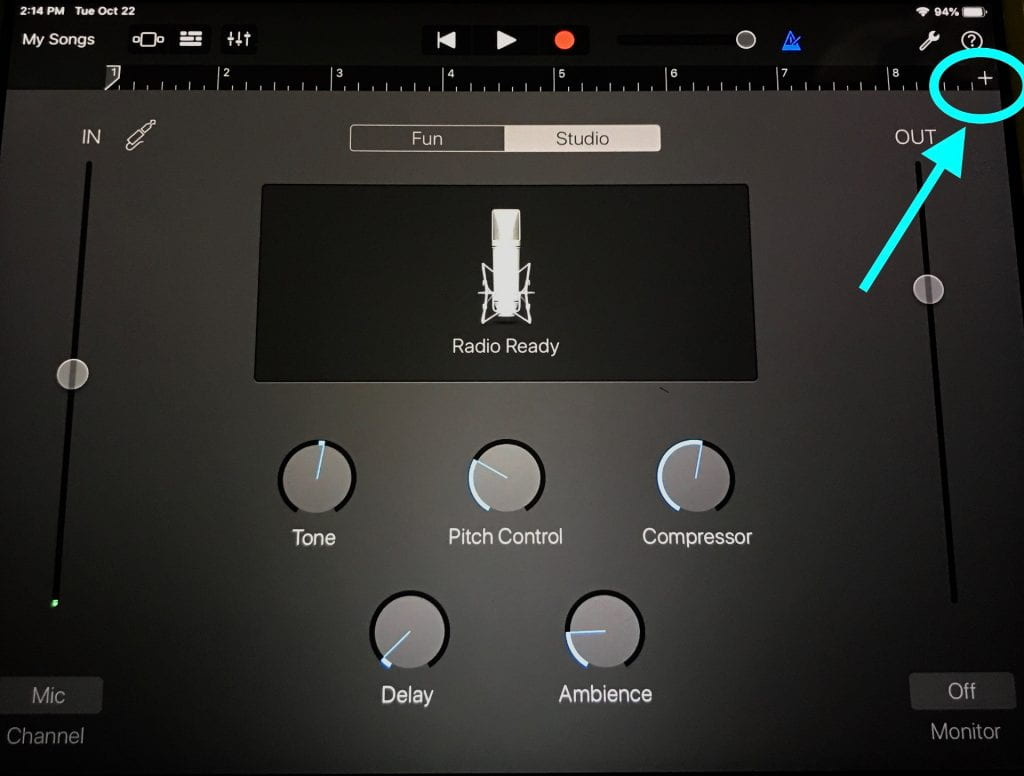
3- Adjust Your Recording:
Once you are done with recording, you can adjust or edit it too. You can adjust the volume, tone, pitch control, compressor, drive and vocal hall of your recorded singing voice.
4- Adding Other Tracks:
You can also add backing or other tracks to your recorded song to have the full song experience.
5- Export Your Recording:
Once you have edited and adjusted your audio recording, now is the time to export it. To export the song:
- Select the triangle button on the screen to access your song.
- Press and hold the recorded file you want to import.
- Select Share and choose where you want to export it.
- After choosing the audio quality and hit Export.
Steps to Do Audio Recording Using Voice Recording App on iPhone
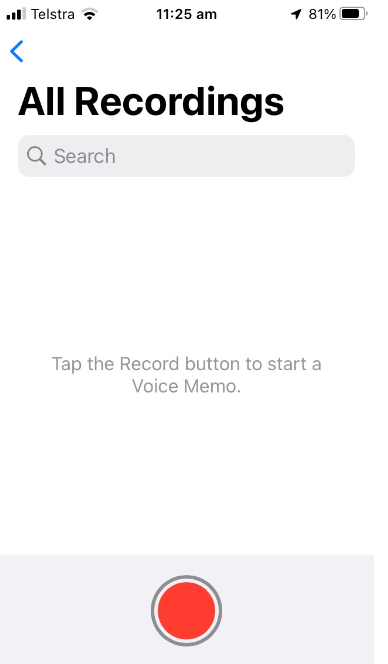
You need a Voice Memo app on your iPhone to record yourself. After you find Voice Memo app, follow the steps mentioned below:
- Once the Voice Memo app is open, you will see the red button at the middle of the screen.
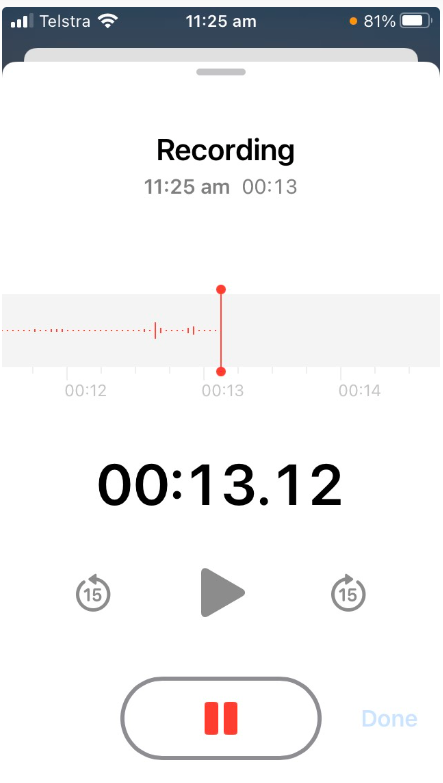
- Once you click the button, it will automatically start recording your singing.
- There is also an option to pause your recording or stop it completely.
- Once you stop the recording, you can go to the All Recordings section and rename the audio title.
- At the bottom left of title, you will see 3 dots. Click on it to edit your recording.
- Once you have captured vocals on your IOS device, export the recording by selecting the file and choosing the sharing option.
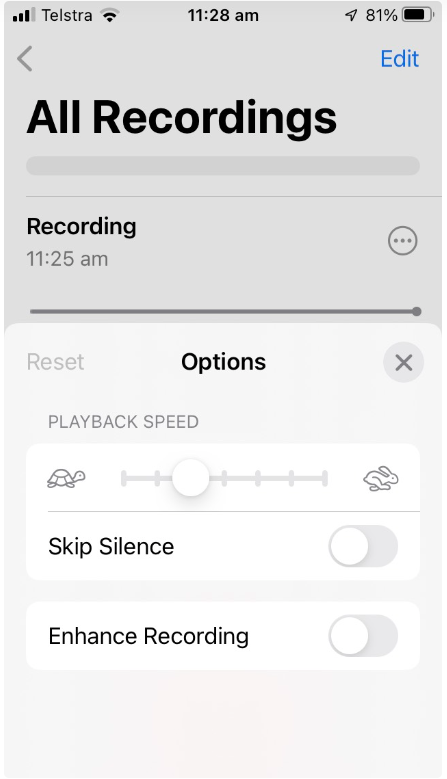
- You can use the Slider in the menu to change playback speed and can choose other setting options to ‘Enhance Recording’ or ‘Skip Silence’.
This is a great way to create singing demos on the iPhone.


